Caring For Lavender Plant Indoors: Tips For Ideal Care
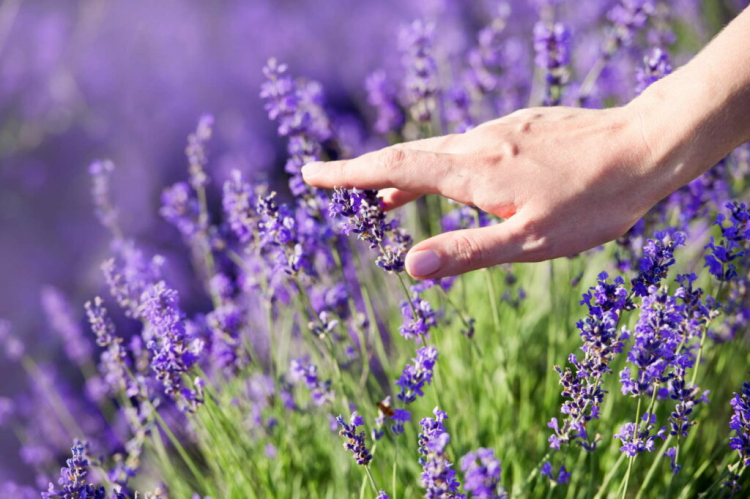
Even if lavender is quite frugal, it needs a little maintenance every now and then. Here you can find out what needs to be considered when caring for lavender plants indoors.
All species of the genus Lavandula originate from the Mediterranean region. Meanwhile, lavender also feels at home in more northern countries and can be found in many domestic gardens. However, an adequate supply of nutrients and water is essential for your lavender bush. However, regular pruning and forest protection measures are also of great importance for flourishing. We have summarized the most important aspects of lavender care for you below. You can also find general information on the subject of lavender here in our overview article.
The Mediterranean lavender prefers warm and sunny locations with calcareous, permeable soil. While the real lavender ( Lavandula angustifolia ) is extremely robust and easy to care for, the crested lavender ( Lavandula stoechas ) and the spitting lavender ( Lavandula latifolia ) require special protective measures, at least over the winter. Proper location and good care will thank your lavender with abundant growth and abundant bloom. You can find more information about the care of the coppice lavender in our special article.
Cut lavender plant indoors
Table of Contents
A regular cut keeps your lavender in shape, promotes plant health, and counteracts long-term baldness in older lavender bushes. It’s best to cut your lavender twice a year. With the first budding in spring, the lavender can be cut back vigorously (by one to two-thirds).

After flowering (mid-July), a slight pruning promotes bushy growth. Young plants can be cut more (up to half) than older ones (around a third). If the lavender is cut too late in summer, the lavender can no longer ripen in time. The last cut should therefore be made at the beginning of August at the latest. If frostbite nevertheless occurs in winter, you can remove the dead plant parts in late spring.
Pour the lavender
Lavender plants indoors can supply themselves very well with water via their long taproot, but waterlogging is a problem and can promote the development of root rot. In the garden bed, you only need to water lavender in the summer during long periods of drought. In winter, watering is only allowed when the soil is frost-free and permeable.
Potted lavender should be watered more regularly. It is best to ensure optimal pot drainage when planting. A drainage hole at the bottom allows excess irrigation water to drain away. Everything else that is important when watering lavender is explained here as well.
You might so like: Hyssop Plant: The Aromatic Garden Herbs At A Glance
Fertilize and lime lavender
You can work some fertilizer or compost into the soil when you are planting. In the following years, annual basic fertilization at the beginning of the growth phase (March / April) is sufficient. It is best to use organic long-term fertilizers such as organic universal fertilizer because this decomposes slowly and provides your lavender with sufficient nutrients over the long term.
In pot cultivation, second fertilization at the beginning of summer (end of June / beginning of July) optimally supports your lavender. Soils with little lime – such as sandy soils – can be improved in spring with a handful of commercially available garden lime. But you shouldn’t just lime it off. Make sure that you actually have real lavender in your garden. After all, there are close relatives – such as the Schopflavender – for whose growth calcareous soils are more of a disadvantage.
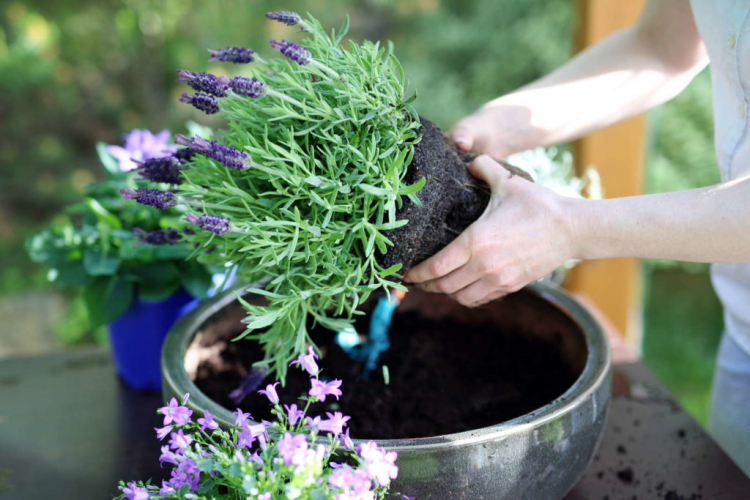
Maintain lavender in a pot
While the robust real lavender can be cultivated in beds all year round, many frost-sensitive species have to move to a pot in autumn at the latest. It should be noted that when cultivated in a pot, lavender forms a very large network of roots that requires a lot of space. A sufficiently large planter is therefore a must. In addition, in this cultivation form, the lavender makes somewhat greater demands on the care due to the small pot volume. Regular pruning, suitable winter storage, and annual repotting are crucial for abundant flowering.
You might so like: The 50 Most Beautiful Shrub Rose Varieties
Repot the lavender
When growing in planters, make sure to transplant your lavender into a larger pot if necessary. The new pot should be about 10 cm larger than the root ball of the plant. The introduction of a drainage layer also prevents waterlogging. You should also replace the old soil with the fresh substrate so that your lavender has enough nutrients available again.
Maintain lavender tree
The term “tree” or “perennial” is actually nonsense in connection with lavender. From a botanical point of view, lavender is one of the subshrubs. Older lavender naturally lignifies with increasing age and can even form a trunk with the right upbringing. The care of the lavender as a high trunk differs only slightly in terms of the procedure for lavender in the form of a bush.
The only major differences are when it comes to cutting the lavender tree. So that you can enjoy your lavender tree for a long time, you should cut it regularly so that the high trunk does not grow wild and, in the worst case, revert to its natural, bushy growth shape. All you have to do is trim the crown. In spring (March / April), when no more frost is expected, you can cut back one to two-thirds of the new shoots. Make sure to keep the crown as round as possible. You can then make a second cut after flowering (mid-July) to stimulate a second flowering.
Hibernate lavender
The Mediterranean lavender is only partially used to the low temperatures in our latitudes. While hardy lavender varieties – such as real lavender – can be planted in the garden bed without any problems, frost-sensitive varieties should better be cultivated in pots.
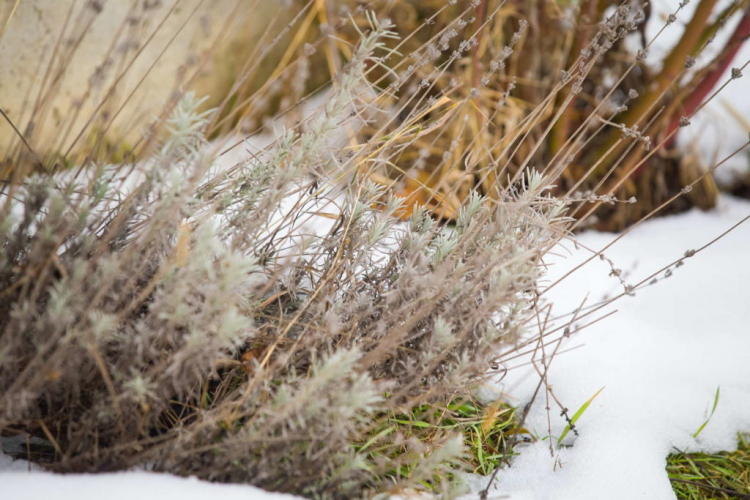
Those species that are overwintered outdoors, however, absolutely need a sheltered location. A layer of brushwood, leaves, or mulch offers you protection from precipitation and cold as well as from excessive sunlight. A cover made of garden fleece or coconut mats, which serves as thermal insulation, also protects against permafrost (below -15 ° C).
You should bring potted plants into the house before the first frost and put them in a dry, unheated room (cellar, garage, or winter garden). If you don’t have enough space inside, the parking space in the garden should always be frost-free and partially shaded. To protect against floor frost, you can place the pot on an insulating mat, styrofoam, or wood. If the temperature drops below zero for a long time, the bucket can also be covered with straw mats as thermal insulation.