How To Grow Microgreens: Step By Step Growing Guide
They are healthy, delicious, and very easy to grow yourself on the windowsill – we tell you what’s behind the new trend microgreens. It’s the latest plant trend from America: Microgreens are currently conquering not only the upscale gastronomy but are also finding more and more enthusiasts among amateur gardeners.
No wonder, after all, the plants in mini format can be grown in a particularly space-saving way, which is why they are particularly popular in urban gardening.
But also their easy care and the fact that they enjoy the reputation of particularly healthy food, ensure that more and more people grow the microgreens. Find out what’s behind the phenomenon and how you can grow microgreens yourself here.
What are microgreens?
Table of Contents
The name says it all: The term “microgreen” covers a whole range of vegetable plants and herbs that can be harvested very early thanks to a special cultivation method. In fact, however, these are not special cultivars, but only the young, edible seedlings of certain plant species that are already harvested when one or two additional leaves have grown next to the cotyledons. Microgreens are thus harvested somewhat later than sprouts, but much earlier than young vegetables, and have a particularly intense flavor.
Suitable plants for microgreen cultivation
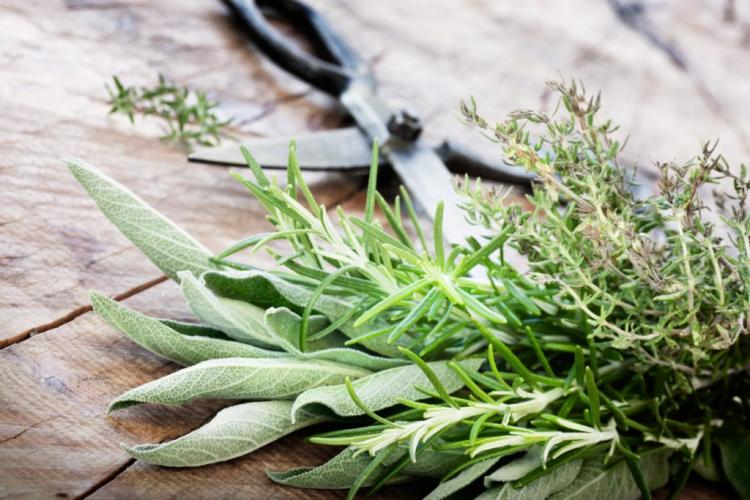
If you think that microgreens can only be grown with very specific plants, you are wrong: fortunately, almost all plants can be cultivated in this way. It is particularly easy to grow microgreens from fast-growing herbs such as cress (Lepidium sativum), parsley (Petroselinum crispum), or dill (Anethum graveolens). However, many types of vegetables can also be cultivated as wonderfully as microgreens.
Cut lettuces are particularly popular, but also radishes (Raphanus sativus var. sativus), carrots (Daucus carota subsp. sativus), and some cabbage varieties. Even wheat (Triticum) and beet (Beta vulgaris) are suitable for cultivation.
However, nightshade plants such as tomato (Solanum Lycopersicum), eggplant (Solanum melongena), or potato (Solanum tuberosum) are not suitable for growing microgreens. Since the green parts of these plants are toxic to humans, the seedlings are also not tolerated by humans.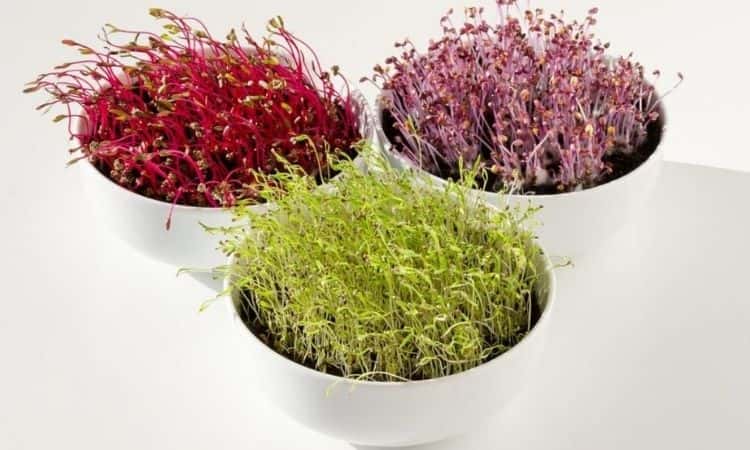
Which plants are suitable for microgreen cultivation?
- Herbs: Dock (Rumex), anise (Pimpinella anisum), basil (Ocimum basilicum), dill (Anethum graveolens), garden melilot (Atriplex hortensis), chervil (Anthriscus cerefolium), Coriander (Coriandrum sativum), Cress (Lepidium sativum), Mint (Mentha), Parsley (Petroselinum crispum), Lemon Balm (Melissa officinalis).
- Vegetables: cauliflower (Brassica oleracea var. botrytis), broccoli (Brassica oleracea var. Italica), beans (Phaseolus vulgaris), peas (Pisum sativum), strawberry spinach (Blitum virgatum), fennel (Foeniculum vulgare), spring onion (Allium fistulosum), carrot (Daucus carota subsp. sativus), chard (Beta vulgaris subsp. Vulgaris), pak choi (Brassica rapa subsp. Chinensis), radish (Raphanus sativus var. sativus), beet (Beta vulgaris), red cabbage (Brassica oleracea convar. capitata var. rubra), arugula (Eruca sativa), celery (Apium graveolens var. dulce).
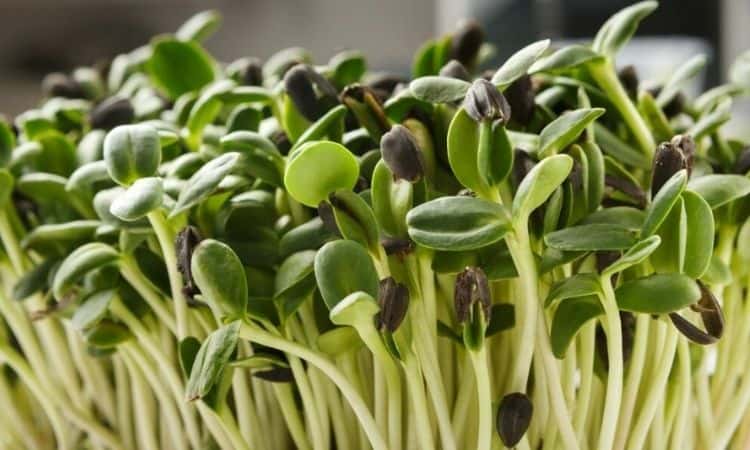
- Other: Amaranth (Amaranthaceae), buckwheat (Fagopyrum), mustard (Sinapis alba), sunflower (Helianthus annuus), wheat (Triticum).
- Not suitable: Tomato (Solanum Lycopersicum), Potato (Solanum tuberosum), Aubergine (Solanum melongena), Pepper (Capsicum).
Growing microgreens yourself
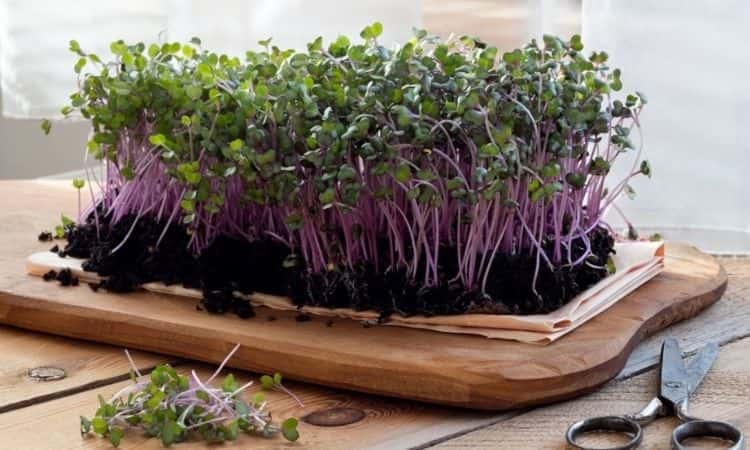
Microgreens are not only healthy and delicious but also absolutely easy to grow. In fact, their care hardly differs from the cultivation of ordinary vegetable seeds. So, in principle, any shallow dish is suitable as a growing container, because the plants grow just as well in an old casserole dish or on a flower pot saucer as in a professional growing tray. The container is filled about 0.7 in. high with growing soil. To increase the water storage capacity, you can also add a few soaked coconut fibers. Now the plants can be sown.
Remember that the plants are harvested at the seedling stage. This circumstance leads to the fact that the plants have a much smaller space requirement and may stand much closer together than usual.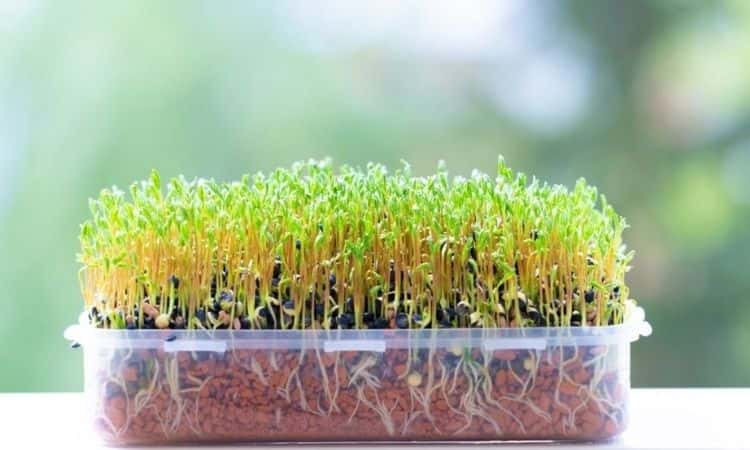
Now distinguish between light and dark germinators: While light seedlings can thrive this way, dark seedlings need to be either covered with a bit of soil or shaded with a second tray of the same size.
By the way, a suitable place for microgreens is a warm, bright windowsill without direct sunlight. If you now place the pot on a small pedestal for better air circulation, the microgreens have optimal site conditions.
Step-by-step instructions Grow microgreens yourself
1. soak large and hard seeds overnight.
2. fill a shallow growing container about 0.8 in high with growing soil add coconut fibers if necessary for higher water storage capacity
3. sow the seeds; the seeds can be placed more closely together
4. press seeds and moisten with the spray bottle
5. if the seeds are dark sprouts, cover them with soil or shade them in some other way.
6. place microgreens in a warm, bright place without direct sunlight
Caring for Microgreens
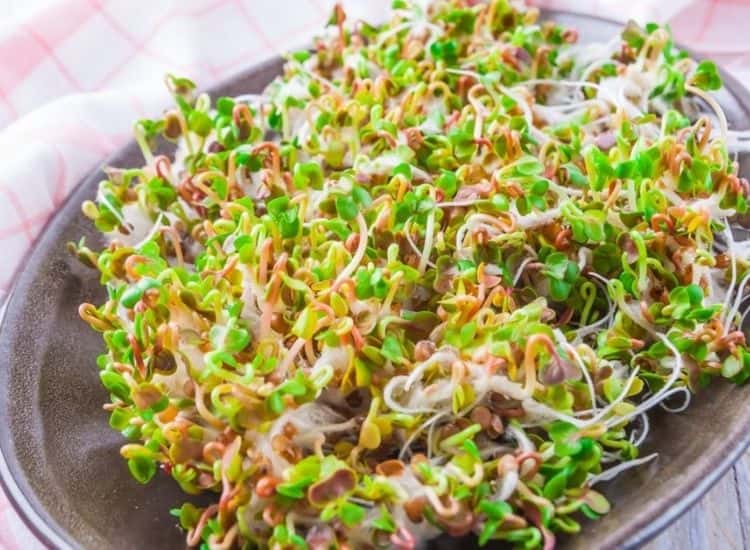
It only takes 10 to 14 days for microgreens to be ready for harvest. However, even in this short period of time, the seedlings want to be carefully cared for. Fortunately, microgreens do not need fertilizer or to be moved during their short growing season.
The only difficulty in growing them is finding the right amount of water: The seedlings like an evenly moist environment and won’t grow properly if it’s dry. However, if they get too wet, they can start to rot or even mold.
Caution is therefore advised, especially in the first few days: For a more accurate dosage, it is recommended to water the microgreens at the beginning with a spray bottle and not with a watering can. Fresh, warm tap water is also best for watering. Water that has been standing for a long time or comes from the rain barrel can be contaminated with germs and should therefore not be used for the microgreens.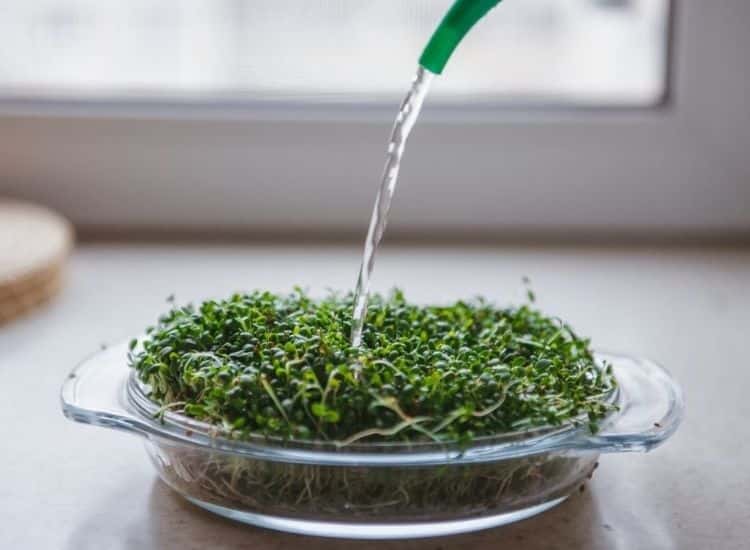
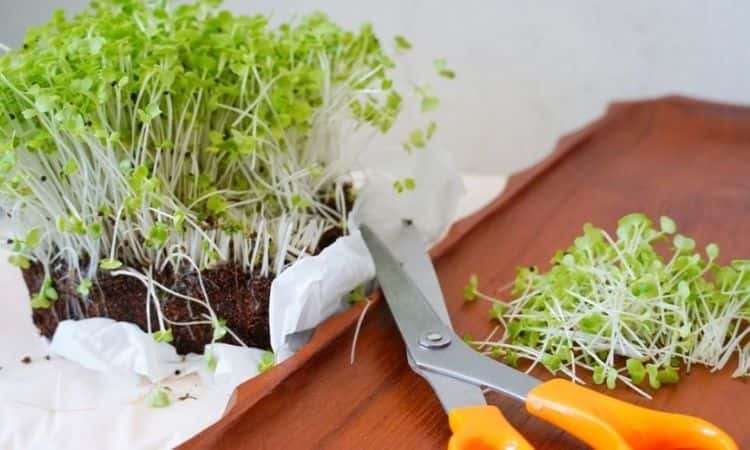
Harvesting microgreens
Anyone who has ever harvested cress in childhood will quickly find out that this is not very different from harvesting microgreens. The seedlings are ready for harvesting when the first true pairs of leaves have formed next to the cotyledons. When harvesting, the plants are cut about a finger’s width above the soil. However, do not harvest too much at once. Since microgreens quickly begin to rot, they must be processed directly. So harvest only as needed.
Are microgreens healthy?
Delicious and above all healthy – microgreens have the reputation of being a real superfood and are supposed to help with the most balanced diet possible. But are they really healthier than full-grown vegetables? In fact, the answer to this question is yes: the proportion of proteins, trace elements and vitamins in microgreens is significantly higher than in the same amount of normal vegetables. However, this effect only comes into play if you really eat larger quantities of the small plants – used as decoration, microgreens have virtually no influence on your well-being.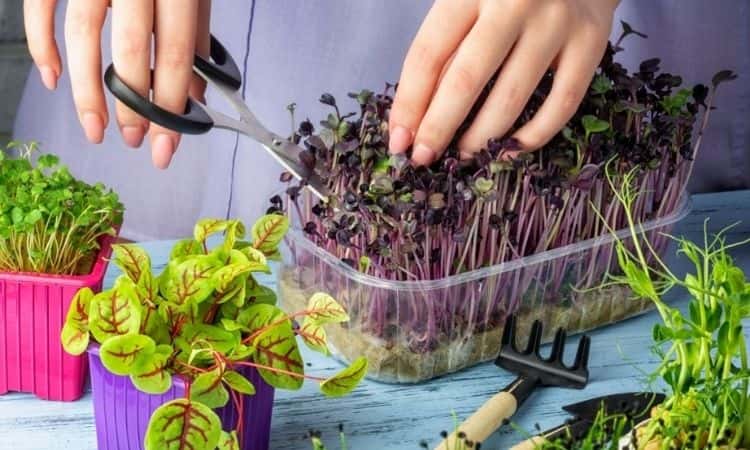
Using microgreens in the kitchen
Microgreens have become a real trend in recent years, especially in upscale restaurants. But the sprouts can also be prepared quickly in the home kitchen. Since the plants are particularly popular because of their high vitamin content, it is recommended to eat microgreens raw. However, the sprouts are also characterized by a much more intense flavor than full-grown vegetables, which is why they are more suitable for seasoning and decorating and not as raw food.
Microgreens are especially common as a topping on various dishes such as soups, but they also work well as an ingredient in a salad and as a component in smoothies. However, microgreens are just as good for making savory herb curd or cream cheese creations. Even a sandwich can become a real taste sensation with microgreens as a topping.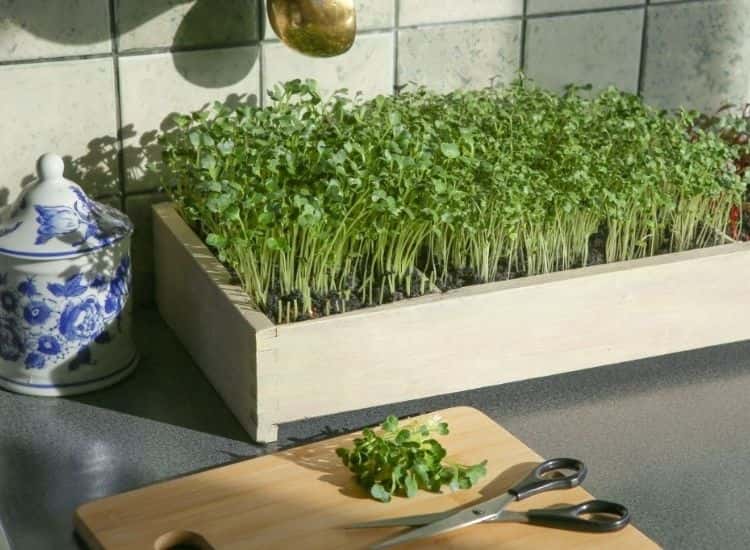
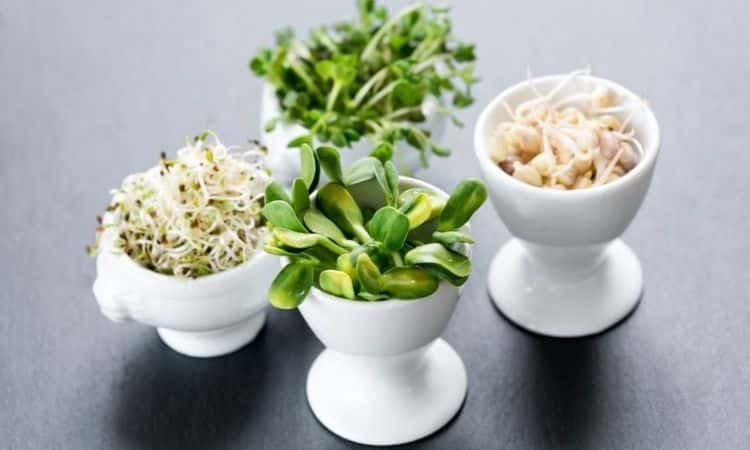
How Grow Sprouts In A Jar?
If you grow sprouts yourself, you can enjoy your own harvest on sandwiches, in salads, in dips or simply on its own after just a few days. The small sprouts are not only particularly quick and easy to cultivate, but also contain many vitamins, minerals and fiber. Sprouts can be grown all year round, which means always fresh greens in the kitchen.
To grow his own sprouts at home, it did not take much: only a suitable container and the selected mixture of sprouts. A particularly simple method is the cultivation in the so-called sprout jar. How such a sprout jar looks exactly, you will learn in the next sections.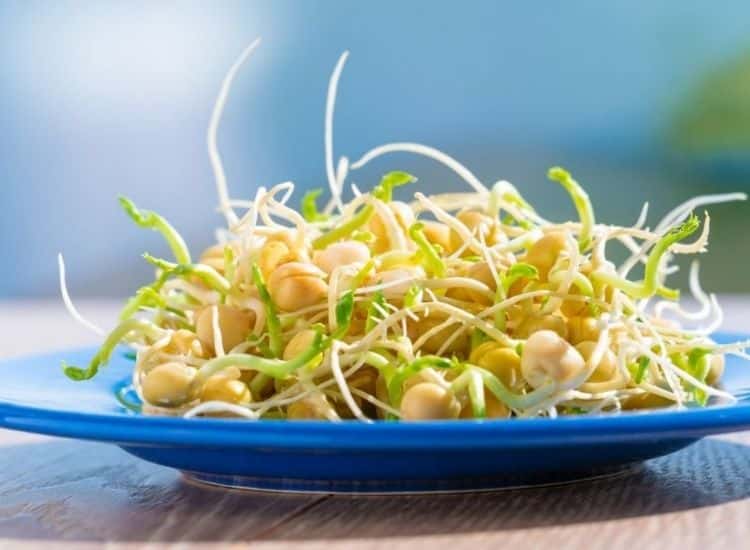
Creating a sprout jar: When is the right time?
Since sprouts are usually grown directly in the kitchen, you can start growing sprouts at any time of the year. Especially in winter, when the selection of fresh vegetables is more limited, you will find aromatic sprouts a delicious addition to soups, spreads or salads.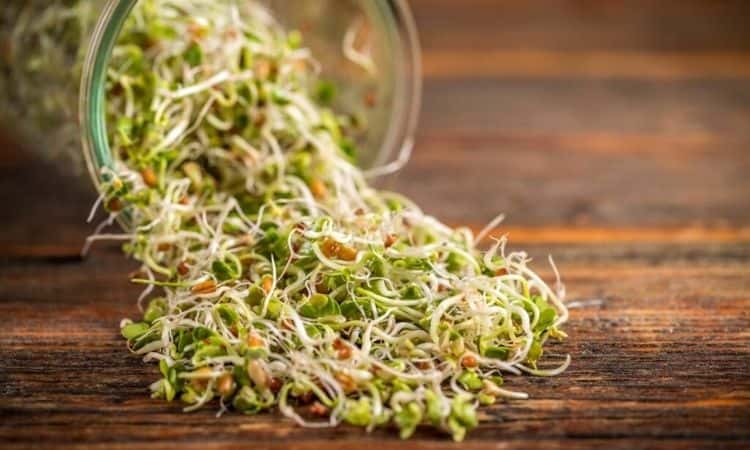
Which sprouts are suitable for a sprout jar?
If you want to grow sprouts, you are spoiled for choice, because you can use the seeds of a wide variety of vegetables, grains and legumes. The germination period, taste and size of the sprouts varies depending on the variety. Typical varieties include alfalfa (Medicago sativa), mung bean (Vigna radiata), and cress (Lepidium sativum).
Almost any sprout variety can be cultivated in the sprout jar. Only very small seeds such as those of cress, rocket (Eruca sativa) or broccoli (Brassica oleracea) are best grown in a so-called sprouting tray.
Problems can also arise with cereal seeds, as it is usually not possible to achieve one hundred percent germination here, and some of the seeds may therefore start to rot. Nevertheless, there is still a wide range of sprout seeds left for the sprout jar. How about chickpea, lentil, radish or onion sprouts, for example?

The perfect sprout jar
Sprouts jar is a normal jar with a height of about 5,9 in. With the jar you get the appropriate lid, which has small holes. These are important so that the irrigation water can drain off and sufficient air can circulate through the glass.
In combination with the lid, there is also a so-called setting device, which holds the glass in an inclined position and ensures that excess water can run off directly. Sprout glasses are available both with a lid and holder made of plastic, as well as metal.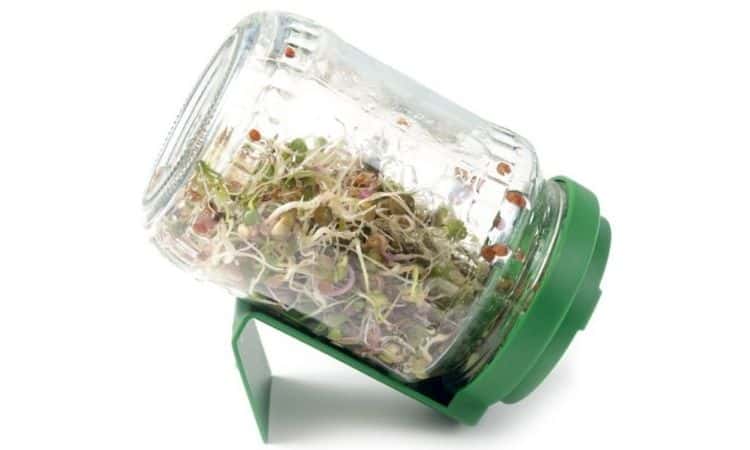
Sprout jar tinker yourself
If you do not want to buy a sprout jar, you can also easily make your own sprout jar. All you need is a large jar, for example a canning jar, 1 to 2 household rubber bands and for covering a waterproof material with holes, for example fly screen.
Cut this to size so that it fits generously over the jar opening. Then secure the material with the household rubber bands. For the inclined position, you can use either a shallow dish or a dish drainer.
Procedure for growing sprouts in a jar
The way to the finished sprouts involves only a few steps.
- First, put 2-3 tablespoons of seeds in a kitchen strainer and rinse them under running water. Then put the seeds in the sprouting jar and cover them with water.
- Now the seeds need to soak for about 10 hours. This process is done for almost all types of sprouts, only some exceptions like cress or flax seeds do not need to be soaked in water. After the soaking time, the water is poured off (great water for watering!) and unswollen seeds can be sorted out. Now the jar is tilted to allow the remaining water to drip off.
- To create ideal germination conditions, it is best to place your sprout jar near a window, but without direct sunlight. The temperature should be between 18 and 22 degrees.
The right care for sprouts in the jar
To make sprouting a complete success, there is only one important care measure to follow: Daily rinsing. Rinse your sprouts with fresh water in the morning and evening and then place the jar back in the holder to drain, this will prevent bacteria or mold from forming.
Meanwhile, you can also take a quick look at your sprouts. If you notice mold or a musty smell, you’d better start the sprouting process all over again.
When can be harvested in the sprout jar?
Depending on the germination time of the sprouts, you can harvest already after 3-4 days. If you can not use all the sprouts directly, it is possible to store them in a jar in the refrigerator for a few days. Before starting a new germination cycle, it is important to thoroughly clean the germination jar with hot water.

Hi. Doing a lot of experimenting with microgreens. Just grew from sunflower seeds sprouts of 20 cm, small leaves, so far edible and tasty. Good as well get peas, beans. Technology: a plastic container, napkins on the bottom, moistening, seeds are covered with a napkin. Packed in a cellophane bag, glued to seal or clothespin on the edge. After some time germinates, sprouts. The same with cereals – wheat, rye.
Thanks, Alex. Have a good harvest!