Amaryllis: Care And Grow, Watering And Fertilizing During The Flowering Period
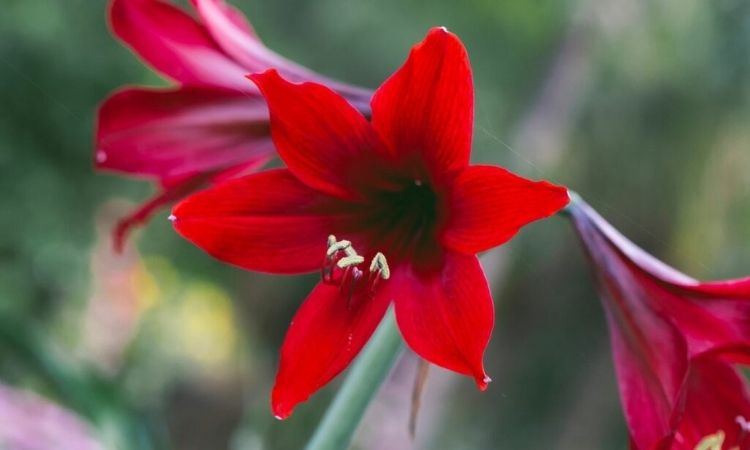
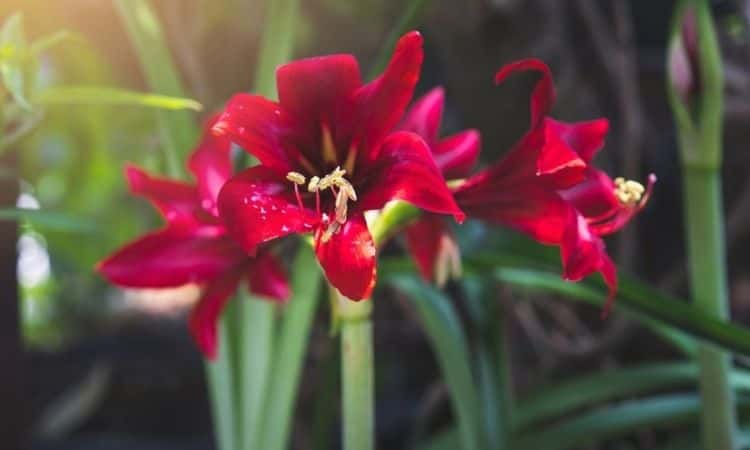
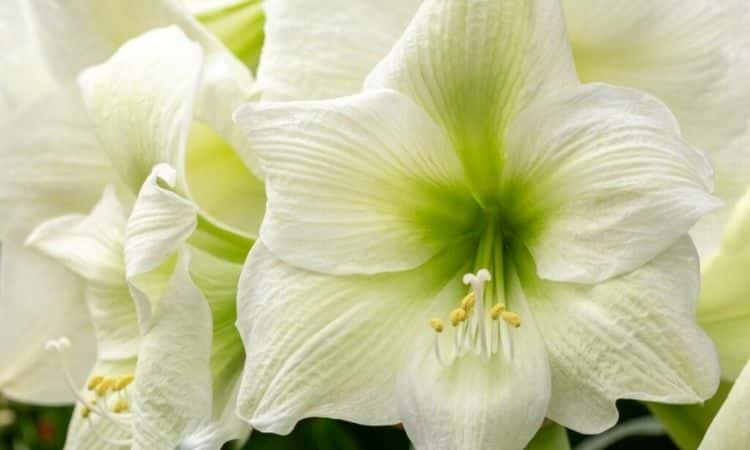
The magnificent star-shaped flowers always create a pre-Christmas mood. We look at what to consider in the care of amaryllis. The various species of amaryllis (Hippeastrum) are also known as delphiniums. Botanically, they are classified in the family of amaryllis (Amaryllidaceae). The designation as Amaryllis for the red, white or pink flowering and bulb-forming plants known to us is not quite correct. In fact, they used to be assigned to the genus Amaryllis.
However, this is now reserved for a single species. It is easy to find out whether it is a true Amaryllis or the knight star that is commonly found in our region: The delphinium first forms its magnificent flower and only then the elongated leaves. The real amaryllis, on the contrary, blooms only after the previous formation of the leaves. Nevertheless, the much represented Hippeastrum species are usually called amaryllis.
Buying Amaryllis: In A Pot Or As A Bulb
Table of Contents
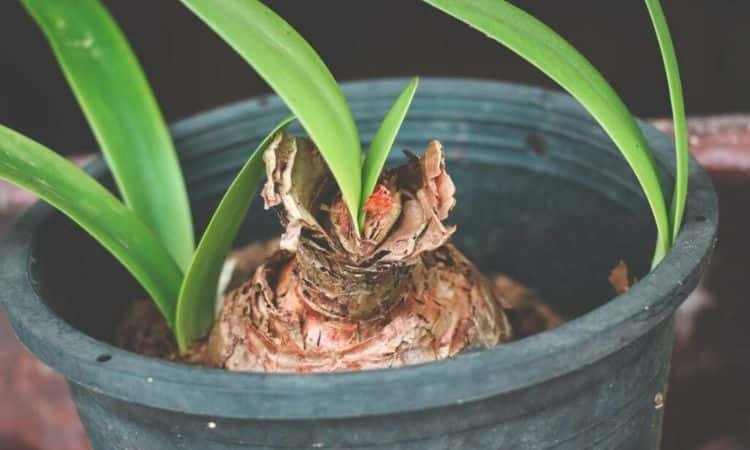
Amaryllis are offered in two ways. Either one decides for the Amaryllis pre-cultivated by the gardener in the pot. Here you can often already see the bulb sprouting. However, you can also buy the loose bulb of the amaryllis and plant it yourself in a pot.
Short and crisp summary of what to consider when buying the amaryllis in a pot or as a loose bulb:
Buying amaryllis in a pot.
- Healthy appearance.
- Substrate not too moist, as waterlogging can be fatal for the bulb.
- Strong bud, because the thicker the bud, the more flowers are likely to be formed.
- During transport, if necessary, protect from too low temperatures – below 50 ° F, it can already become critical.
Buy amaryllis as a bulb
- The loose bulb can be planted from October to December itself.
- Do not choose a pot too large – between the bulb and the edge of the pot should be only 0.39 – 0.78 inches on all sides.
- As a substrate, a commercial potting soil based on compost or peat with a pH of 6.0 to 7.5 is suitable.
- Cover the bottom half to two-thirds of the bulb in the pot with soil.
- Leave upper third to half of the bulb peeking out of the soil.
- After planting, water lightly to allow the substrate to settle slightly.
- Place bulb in a warm place to sprout (room temperature around 68 °F).
The following phases determine the life and needs of amaryllis:
- Flowering from December to February
- Growth from March to August
- Dormant phase August to December
In this article, we are devoted exclusively to the preferences of the amaryllis during flowering. If you do not want the plant to give way after flowering and bloom for another few years, you can read here in the article on how to care for amaryllis after flowering, how to once again elicit the impressive flowers from the bulb.
Amaryllis: Care During The Flowering Period
In order for the amaryllis to feel comfortable and for it to bloom as splendidly as possible, there are a few things to keep in mind for optimal care.
The Right Location
The right location for blooming amaryllis is indoors. It does not even matter whether this place is located flooded with light on the board of a bright window, or rather on a dresser in a rather darker place in the hallway. The important thing is essential that the room temperature (around 68 °F) is given. Therefore, care should be taken when during the cold season times bump ventilated to let fresh air into the house: In any case, the amaryllis should be taken out of the line of frosty-fresh air to avoid cold damage.
The right temperature
- The amaryllis is very sensitive to cold. Therefore, the temperatures in its environment should not be below 59 ° F. Nevertheless, different temperatures can be optimal in the culture of the amaryllis.
- If the amaryllis is still in the bud stage and thus still needs to be driven until it blooms, temperatures around 68 °F will accelerate this process. Thus, the time until the appearance of the flower can be shortened.
- If the amaryllis is already showing its impressive flowers, you want to keep it alive as long as possible. For this purpose, somewhat lower temperatures between 59 and 68 °F are suitable.
Properly Watering And Fertilizing Flowering Amaryllis
When watering the flowering amaryllis, less is definitely more! The water requirement is rather low and it can quickly happen that the substrate contains too much water. Since the bulb tends to grow mold quickly when waterlogged, a small amount of water should only be given when the substrate visibly begins to dry out. It is best to pour the water into the repot or trivet. This will prevent water from getting directly on the bulb and provoking a mold.
During flowering, fertilization of the amaryllis is not necessary. The supply is provided by the nutrient-storing bulb. If the amaryllis is well supplied with nutrients during its growth phase in spring and summer, it can still draw on these during flowering. Between April and August, fertilizer should be applied regularly.
The correct care of flowering amaryllis at a glance
- A warm location does not necessarily have to be bright.
- Drifting tends to be warmer than during flowering in order to shorten the time until flowering and to extend the flowering period.
- Protect from temperatures below 59 °F (drafts, during transport).
- Low watering only when the substrate dries out to avoid waterlogging.
- Fertilize between April and August.
Life After Flowering
Once the amaryllis has faded, it should by no means have to vacate its place forever. With relatively little care, it can easily be brought to bloom the next winter. After flowering, the faded inflorescences are cut off. If frost no longer threatens, the amaryllis plant can even be planted out in the bed. The main growing season is until August when the amaryllis needs the most water and nutrients. Therefore, it must be fertilized regularly (every one or two weeks).
From the end of August, the dormant period begins. Fertilizing is stopped and watering is reduced. After the foliage has dried up, this is cut off. Finally, the bulb must be protected from the first early frosts. Therefore, it is replanted in a fresh substrate in a pot and placed in a cool place for ten to 12 weeks. Then, starting in December, the game begins again and the amaryllis is placed indoors in a warm place. The forcing has begun and after a few weeks, the first flowers will be seen.
Amaryllis Grow From Seed
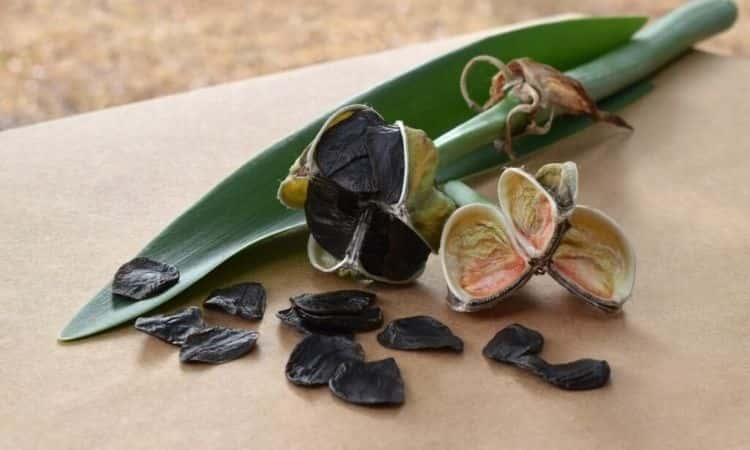
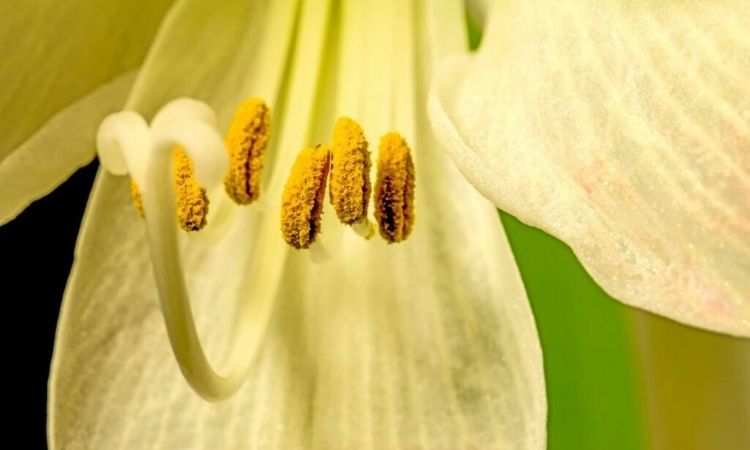
Propagation from the seeds of amaryllis is possible, but for the amateur gardener, it is also very laborious. In addition, the characteristics of the offspring may be different from those of the mother plant, due to the genetic splitting of certain characteristics. Pollination must be done by hand. The pollen-rich anthers are rubbed on the stigma. This can be done by pollinating the stigma of the same flower (self-pollination) or the stigma of another amaryllis plant (cross-pollination).
The best fertilization success through manual pollination is achieved when only the first two flowers of a flower are pollinated and all other flowers are removed. Approximately eight weeks after pollination, the seeds are ripe and can be harvested. They should be sown immediately, as the germination capacity decreases quickly. After about four weeks, the first seedlings appear.
The seedlings are pricked out and initially cultivated for 2.5 years until they can be prepared for driving flowering in the second autumn. Here is the procedure if you want to grow amaryllis from seed:
- Hand pollination required
- It is best to pollinate the first two flowers of a bulb, remove the remaining flowers
- Self-pollination or cross-pollination possible
- Seeds can be harvested after about 8 weeks
- Best sown directly, as the germination rate decreases more quickly with increasing storage time
- Germination occurs after about 4 weeks
- Prick out seedlings, pot, and cultivate for 2.5 years
- In the second fall, prepare the seedlings for forcing and flowering
Here is the procedure if you want to propagate amaryllis by incubating bulbs:
- Use cuts in the base of the mother bulb to increase the likelihood of the formation of brood bulbs.
- Remove the bulbs from the mother bulb when repotting in November.
- Store the bulbs at 58 °F and plant them in January.
- In the second fall, make preparations for the flowering of the amaryllis
Propagate Amaryllis By Onion Skin Cuttings
Amaryllis can also be propagated by so-called bulb cup cuttings. For this purpose, the bulbs to be propagated are not driven in winter and brought into bloom, but are further stored at relatively low temperatures. It is optimal to start propagation from January. The bulb of the amaryllis is slightly cut at the bottom, so as to remove the roots. Vertically, the bulb is now cut in half and continues to cut in a vertical direction.
Depending on the size of the amaryllis bulb, 12 to 16 equal-sized individual pieces can be cut from one bulb without any problems. The onion splits can each be divided again vertically into two to three pieces of the same size. In this way, elongated, narrow onion pieces are obtained, each of which contains part of the onion base. In the direction of growth, these are then placed in sand. At temperatures above 78°F, new roots form quickly and after a quarter of a year, small bulbs can be seen from which leaves form. After transplanting in summer/autumn, the newly obtained bulbs should be left for another year and also not used for flowering until the second autumn.
Here is the procedure if you want to propagate amaryllis by bulb cup cuttings:
- Do not sprout amaryllis bulbs, but continue to store them at rather lower temperatures until January
- Remove roots and lightly cut bulb base
- Cut onion vertically into 12 to 16 equally sized onion wedges
- Cut onion wedges in half or thirds again, also in the vertical direction
- Place onion pieces in the sand in the direction of growth
- Optimal temperature 78 – 88 °F
- Root formation after a few weeks, bulb formation after a quarter of a year
- Transplant and clear in the second fall and use for flowering
There are several promising methods available to propagate the amaryllis itself. However, compared to other crops, all of them are relatively laborious. However, the relatively long time and diligence that both must be expended to produce a bloom on self-propagated amaryllis will pay off in the end in gorgeous blooms!