Compost Worms: Types, Function And Tips For Propagation
Compost worms help to quickly turn your organic waste into fertile compost. We explain which worms you can buy and multiply for this purpose.
Worms have long been popular with children not only with their winding, glittering bodies. They work as useful composters in compost heaps, large composting plants, or private worm boxes. This article gives you an overview of the most suitable species, what they do inside the compost, the general structure of a worm box or worm farm, and some tips on how to obtain and multiply your own worms.
Compost worms are specimens that occur in compost heaps or are even used specifically in compost heaps or worm boxes. They are multiplied by the thousands in so-called worm farms and are also used in large, professional composting plants.
Types of compost worms
Table of Contents
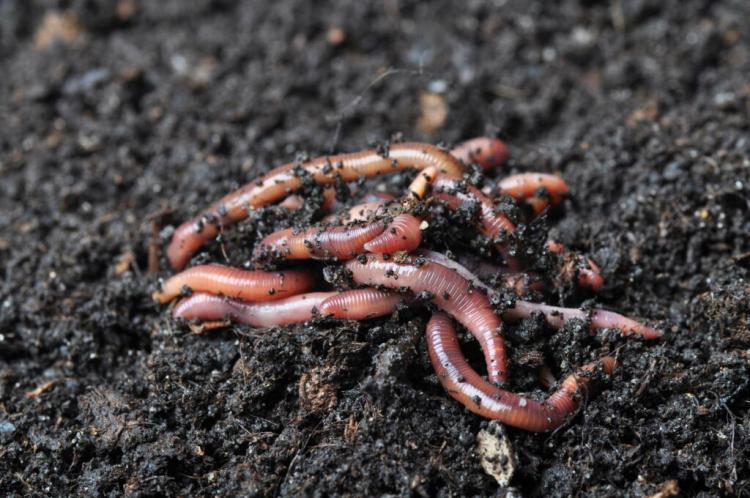
The term “compost worms” includes more than just one type of worm: In principle, a wide variety of worms can help to compost – although some are more effective than others
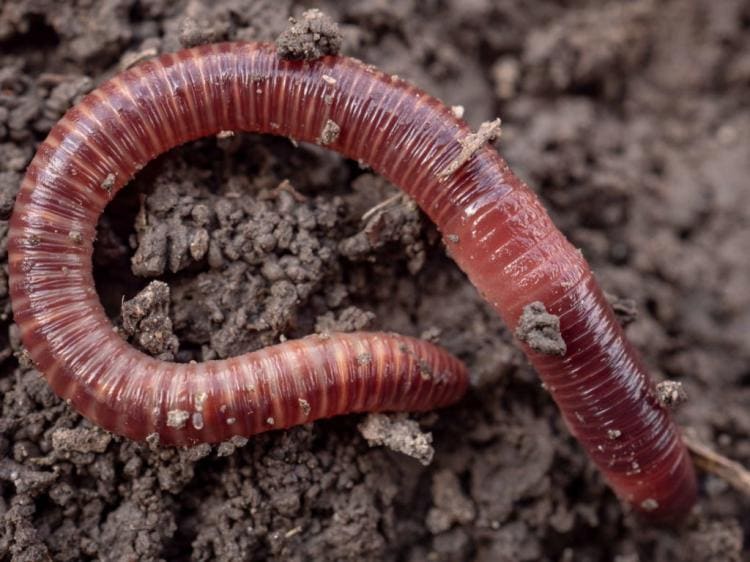
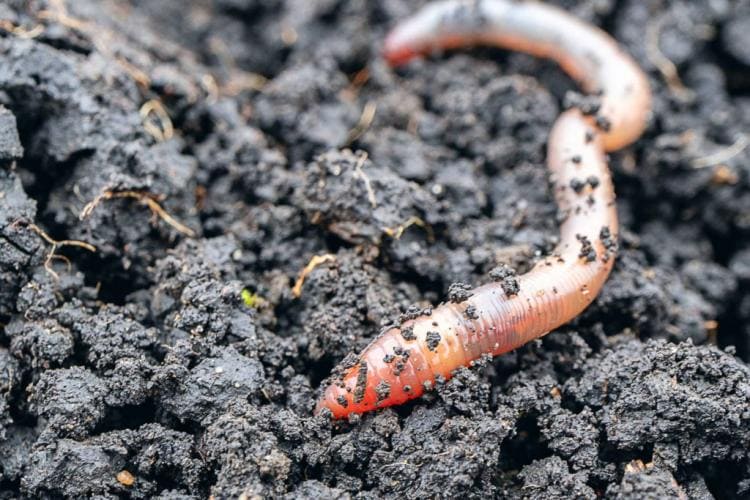
The compost worm can be recognized by its ringlets – the color, however, is very variable
We introduce you to the small, useful comrades in more detail:
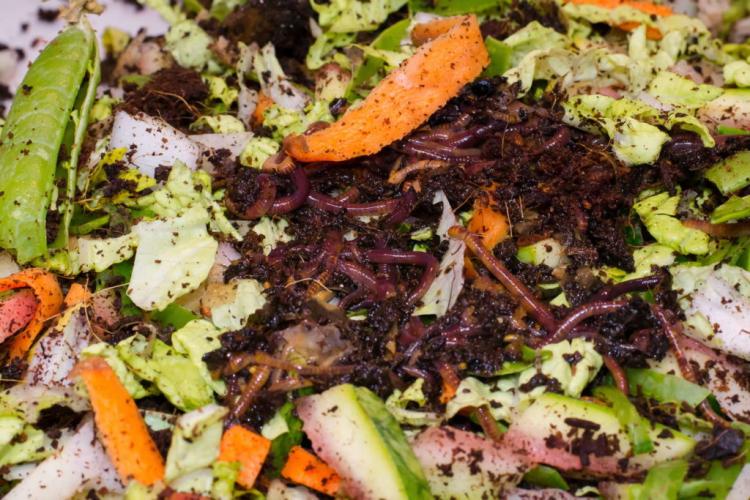
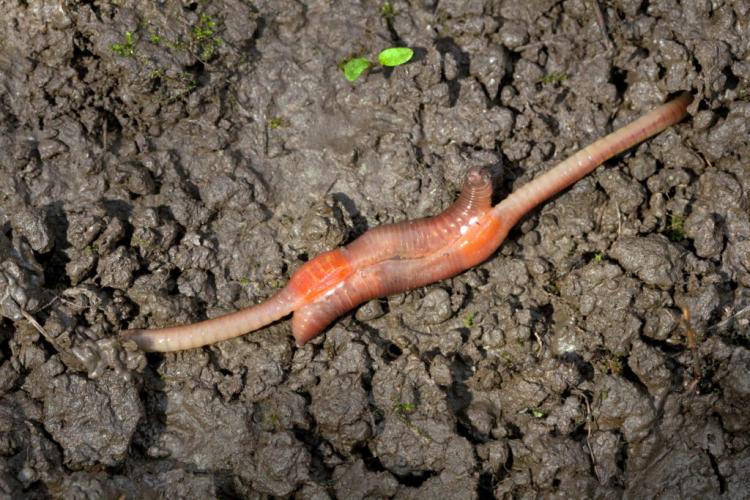
- Eisenia fetida (compost worm/lungworm/stink worm): This worm is one of the most common worms in Europe. He likes to stay in compost waste, but also under the sward of natural meadows. It lives more in the upper soil layer, where a lot of fresh organic material can be found. Every day he can eat half his body weight on compost and excrete a precursor of worm humus. This makes Eisenia fetida one of the most hard-working compost helpers, which is why it is often used to speed up composting. The lungworm usually has lighter and darker “ringlets”.
- Eisenia Andrei: This earthworm species is closely related to Eisenia fetida and is therefore often confused with it. Size and way of life are identical, the two species only differ in their coloration: The species Eisenia Andrei is mostly dark red in color. However, these differences are not always clearly pronounced, so that this increases the likelihood of confusion.
- Eisenia hortensis (European earthworm): This is also an earthworm that is native to Europe. It is blue-greyish, ringed pink, and often has yellowish ends. In the past, it was only used as fishing bait, but is now also valued as a composting aid. Its peculiarity is that it prefers coarse, woody material. This is rather spurned by Eisenia fetida and Eisenia Andrei so that the species complement each other well. According to experience reports, it reproduces a little more slowly than the two types mentioned above and also becomes a little larger.
Collect and multiply earthworms yourself?
There are worms in abundance in healthy soils and on top of that for free: Couldn’t you just collect and propagate them yourself? Certainly, there is this possibility. However, you should better look in a well-run compost heap, because here you will find worm genera and species that seem to like to live in a loose, nutrient-rich substrate.
Not every earthworm feels comfortable in a compost
Earthworms in the USA can belong to one of 15 genera and 47 species – each of them is adapted in one way or another to a special habitat and not every earthworm feels comfortable in the composter or the even smaller worm box. In particular, the representatives that dig deep into the ground often perish in small worm boxes.
Summary compost worms:
- The common compost worms are Eisenia fetida, E. Andrei and E. hortensis
- They differ slightly in appearance and lifestyle, but all three are effective compost helpers
- Collecting worms for composting yourself is difficult because there are so many different types of worms with different needs
What do compost worms do in compost?
Compost worms do not have extremities, eyes, or tentacles – but they do have a particularly large appetite. The compost worms eat and digest a little differently than we humans: their front gullet is surrounded by a kind of upper lip. From the mouth opening, the intestine leads once from the front end to the rear end of the worm. It is not surrounded by a skeleton or cartilage, but only by other organs that are supported in a shell of muscles. The skin muscle tube protects against the outside and also helps to hold everything together.
Compost worms have a particularly large appetite
The intestine begins with the throat known as the “pharynx”, which is very muscular. If the worm eats, it opens some soft compost material with its upper jaw and then simply pushes itself against it with its mouth open so that its pharynx is filled. Small stones and sand are also swallowed. Everything together gets through the esophagus into the gizzard, where it is kneaded together and crushed by the stones.
Now it is transported further into the midgut, which is very long and provided with indentations to increase the surface area for nutrient uptake. The digested compost finally leaves the worm through the anus. In the process, it excretes calcium, which neutralizes the acidic material and ensures that the worm droppings are cemented. This is how the worm heaps arise, which an attentive observer can find with the naked eye wherever worms live.
Tip: In the soil, worms are considered to be the most effective mixers of mineral and organic soil components: Since they also absorb clay particles, stones, and other soil components in addition to their food, they knead all these elements in their stomach. The excreted calcium forms stable bridges between organic and mineral components. All the feces are held together by a layer of mucus. Further processing by bacteria and fungi results in porous, stable humus crumbs
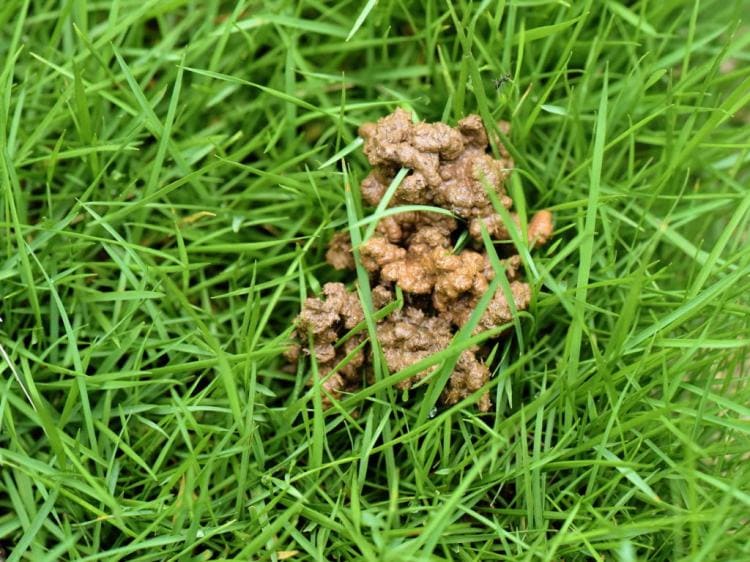
The excretions of worms are held together by a layer of mucus
The summary function of compost worms:
- Compost worms eat by ingesting surrounding material, which also includes stones, sand, and other mineral soil components
- During excretion, calcium is added to the worm droppings and covered with a layer of mucus; both hold the pile tightly together
- Bacteria and fungi can convert the worm droppings into humus crumbs
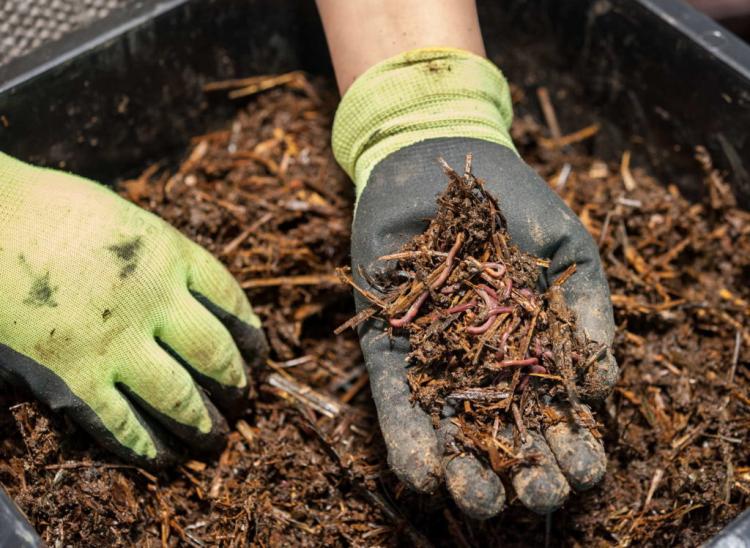
Compost worms in the worm box
As I said, worms don’t just go about their day’s work in compost heaps or composters: Keeping worms in boxes has various advantages for you:
- Compost worms accelerate composting and stabilize the resulting humus crumbs through their calcium and mucus excretion
- In worm farms – i.e. propagation boxes for worms – so much offspring are produced that you can sell them at a profit to composting plants and private compost owners
- Anglers often run their own worm farms so that they always have enough fresh bait available
- Some compost owners multiply worms to be able to supply freshly made compost heaps directly with a large number of useful helpers; this way, composting is started quickly
- Worm boxes for interior composting can be operated directly in the apartment and compost there any waste that would otherwise end up in the organic waste bin
A worm box converts organic waste into noble worm humus.
Basically, worm boxes are always large-volume boxes made of plastic or wood, which are usually divided into at least two chambers. The subdivision is always easy for the worms to overcome – it is realized by perforated boards or grids. The crate made of untreated wood is the simplest variant, but it also places the highest demands on the operator.
Sophisticated plastic boxes, divided into levels, with a tap for draining the resulting liquid – the “worm tea” – make it much easier for the user. What happens in the box, however, does not differ: At the beginning, a mixture of different compost materials is put together with the worms in a chamber. Gradually the chamber is filled with the material until nothing more goes inside. In the case of multi-chamber systems, the operator now goes over to filling another chamber.
With single-chamber systems, the rotting material is regularly pushed together in “piles” to separate fresh and old material from one another. Once the worms have worked through an area and find less promising food, they begin to migrate to where “the grass is greener”: They go to another area of the worm box to get fresh compost. If all worms have moved there, you can remove the finished worm compost.
Summary of compost worms in the worm box:
- Worms are kept in boxes either for targeted reproduction or to produce vermicompost
- Worm boxes can be very simple or divided into several chambers, between which the worms can switch; they pull after the freshest compost material so that completely processed vermicompost can be easily removed
- In addition to the functional worm boxes, there are now also those that look more like a piece of furniture in the interior
Once the worms have migrated to the next chamber of the worm farm, you can remove the finished worm compost
Buy or attract compost worms
As mentioned in the description of the compost worms, there are big differences between the deep-burrowing earthworms under meadows and beds and the flat-living, hungry compost worms. Certainly, “catching”, identifying, and multiplying suitable worms can become an instructive and exciting long-term project. On the other hand, the purchase is of course worthwhile mainly because of the great time and labor savings. Usually, several hundred worms are offered at once. When shopping, you should be careful to choose a mixture of different types of worms. Since each has a certain food preference, the most suitable type for you will dominate in the long run.
You might so like: Composting Tips And Tricks How To Make Compost Faster
Live worm sellers naturally rely on their worms to reach their destination alive. For this reason, an order in deep winter or midsummer may not be immediately successful: Since the worms are included in the shipping package, the shipping must be postponed to a favorable time. You can run a normal compost without any additional worms if naturally occurring worms can immigrate from the outside. However, you should not start operating an indoor worm box until the worms have arrived.

Catching the right worm species for the compost is not that easy
If you’d rather collect and multiply worms, here are some tips:
- Look in places where the food supply for worms roughly corresponds to what you will later put in the worm box – for example in compost heaps
- You can also use bait made from your kitchen trash. With regular checks, you should soon find some worms – and other beneficial organisms – in it
- Make sure to start the reproduction with as large a group of worms as possible: Otherwise, reduced activity and viability as a result of strong inbreeding can bring composting to a standstill. Start with at least 50 worms
- If you have friends who also run a worm box, they can certainly offer you some worms as well
Summary Buy or attract compost worms:
- Buying compost worms is a huge time saver
- Choose a mix of different species of worms
- The dispatch must be postponed in the event of very cold or very warm temperatures
- Compost heaps can also be made without compost worms, worm boxes are better not
- It is best to collect worms where the food supply corresponds to their later diet
- Do not start reproduction with fewer than 50 worms
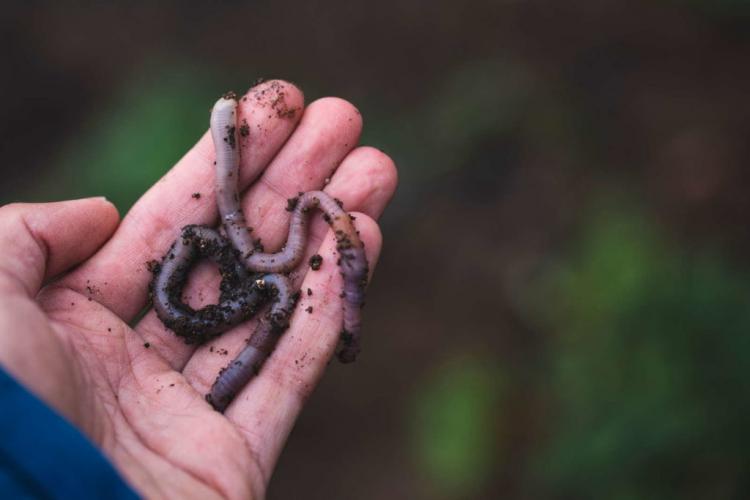
Compost worms can be attracted by bait from kitchen scraps
Propagate compost worms
When you have enough healthy worms available, you can start reproducing. You can do this in your worm box or other containers. However, the following conditions must be met:
- The place of propagation must be sufficiently well ventilated. A poor supply of oxygen leads to the fermentation of the worm feed, making it unusable. The worms can also suffocate.
- At the place of reproduction, the temperature should always be around 20 ° C, because at this temperature the worms are most active and most willing to reproduce. Temperatures of less than 0 ° C or more than 30 ° C should never prevail in the box – in the medium term that would be death for all microorganisms and worms.
- The contents of the box should be kept moist at all times and must not be saturated with water at the same time. Regular moistening with a spray bottle or by careful watering may be necessary if not enough water with the worm food gets into the box. A layer of cardboard felt or hemp fiber – also moistened – can minimize water loss through evaporation. If it does get too wet, you should drain off excess water, which many worm boxes make possible with the help of a tap. If there is no such thing, you can counteract this by mixing in absorbent scraps of paper and cardboard.
- The contents of the box – both food and habitat for the worms – must not become too acidic. You should therefore not add leftover citrus fruits or rhubarb. If a measurement of the pH value shows a value close to 6.5, you should use lime to neutralize the acid – shells of boiled eggs are also suitable here. The regular addition of wood shavings can also help: When they are converted, alkaline substances are created that counteract acidification.
- Since worms usually live in the ground, they like it dark. A cover should keep all sun and predators away and at the same time ensure good ventilation.
- The amount of food should be neither too small nor too large. A worm can eat and digest a maximum of half its own weight every day. Weighing the worms at the beginning will tell you how much food to add. The too much unused feed material can lead to the multiplication of undesirable bacteria and ultimately to rot and stench. To disturb the worms as little as possible, you should concentrate on the addition of the food one day a week.
- If you intend to operate the worm farm for a longer period of time, it will be necessary to supply trace elements in the form of rock flour or special worm-mineral mixes. If you use rock flour, you should pay attention to the original rock: granite and diorite, for example, produce acidic rock flour that lowers the pH value. Littering once a month is sufficient.
After mating, a protective cocoon forms around the worm eggs
Tip: Like all worms, compost worms are hermaphrodites, also known as hermaphrodites. They have both male and female sex organs. These are located in the clitellum, the wide belt that every sexually mature worm wears. When mating, the genital organs come into mutual contact so that in the best-case scenario, both worms are fertilized. In fact, this only succeeds in 50% of all pairing attempts. If fertilization has taken place, the clitellum will migrate steadily backward on the warm body in the coming days and will eventually be stripped off. It now forms a protective cocoon around the worm eggs, from which small worms will soon hatch.
You might so like: Tobacco Beetle: Recognize And Fight The Cigar Enemy
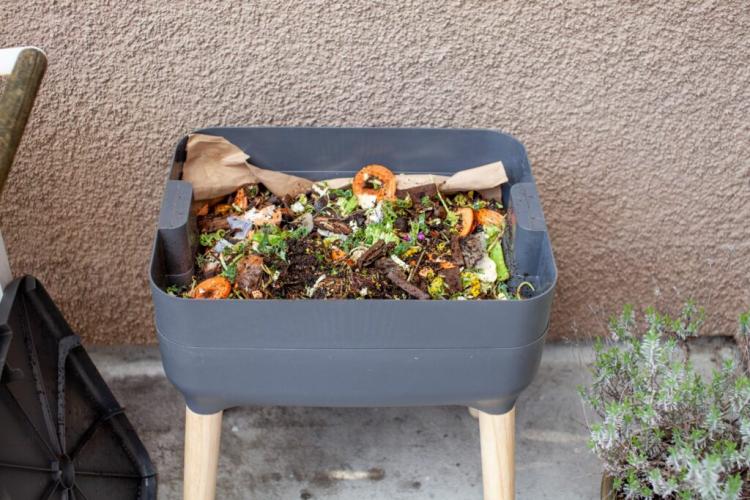
Food for compost worms
What is the worm’s favorite food? If you have collected your worms yourself, you should orientate yourself on the bait used or where it was found. Worms from a thick layer of foliage probably love foliage, worms from the dung heap prefer dung and those from a compost heap full of kitchen trash love kitchen trash. You can even sort them in this way: if you put all the worms you have collected in connected chambers with various compost waste, they will be sorted according to your preferences after a few days. Below is a table that gives you an overview of suitable and unsuitable worm food.
| Suitable as worm food | Unsuitable as worm food |
|---|---|
| Raw fruit and vegetable scraps | Cooked leftover food (only if nothing else is available) |
| Crumbled old bread/rolls | Banana peels (only small amounts) |
| Bowls of boiled eggs | Meat (never) |
| Tea and coffee grounds | Citrus fruits, rhubarb (only small amounts) |
| Cardboard and paper | Garlic (only small amounts) |
| Wood chips, other wood scraps | Raw eggs (never) |
| Cotton Linen | Dairy products (never) |
| House dust, hair, fingernails | Printed paper, pesticide-contaminated fruits, and vegetables |